Evaluation
On the day of the final show, I arrived forty-five minutes
before my model to ensure everything had been set up and I had enough food to
keep us going. I had given her a dressing gown, socks and nipple covers for her
to get changed into prior to starting. I also had a hot water bottle to hand if
she were to become cold.
I had an hour before the run through to make a good start,
so I made sure the hair was up in a high ponytail. I used Gafquat to slick the
hair down, but the use of water made her hair naturally frizzy at the ends. I
knew this would be a problem later in the day but decided to start painting. I
aimed to block out all of the yellow highlights before the run through, and
maybe a bit more if I could. I managed to do all of the highlights and cover
the top half of the body with paint, so I was happy with the head start.
The run through ensured that the models knew exactly what
they had to do, and also so they could get used to their shoes. The shoes were
too big for the model, so by taping them to her feet with black electrical
tape, it made her feel a lot more stable. This wouldn’t have been seen once the
look was complete, as her feet are painted black anyway.
Once the run through was complete, I continued to block out
the colours on to the body. This was a lot easier than the day of my photo
shoot, as the barrier cream was preventing the colour to sit properly on the
skin. This time however, I only used barrier cream on the elbows and the knees.
This helped the paint to take to the skin and made the process so much easier.
I decided to leave the armpits till last, as my model was very hot. Once the
colours were blocked, I blended them together with a slightly damp kabuki
brush. Again, this was much easier this time round, as the paint had been laid
nice and thickly. I then contoured the body with a dark blue, blending as I
went. This was a fairly quick process and didn’t encounter any problems. By
contouring with this colour, I added depth and shape to my design.
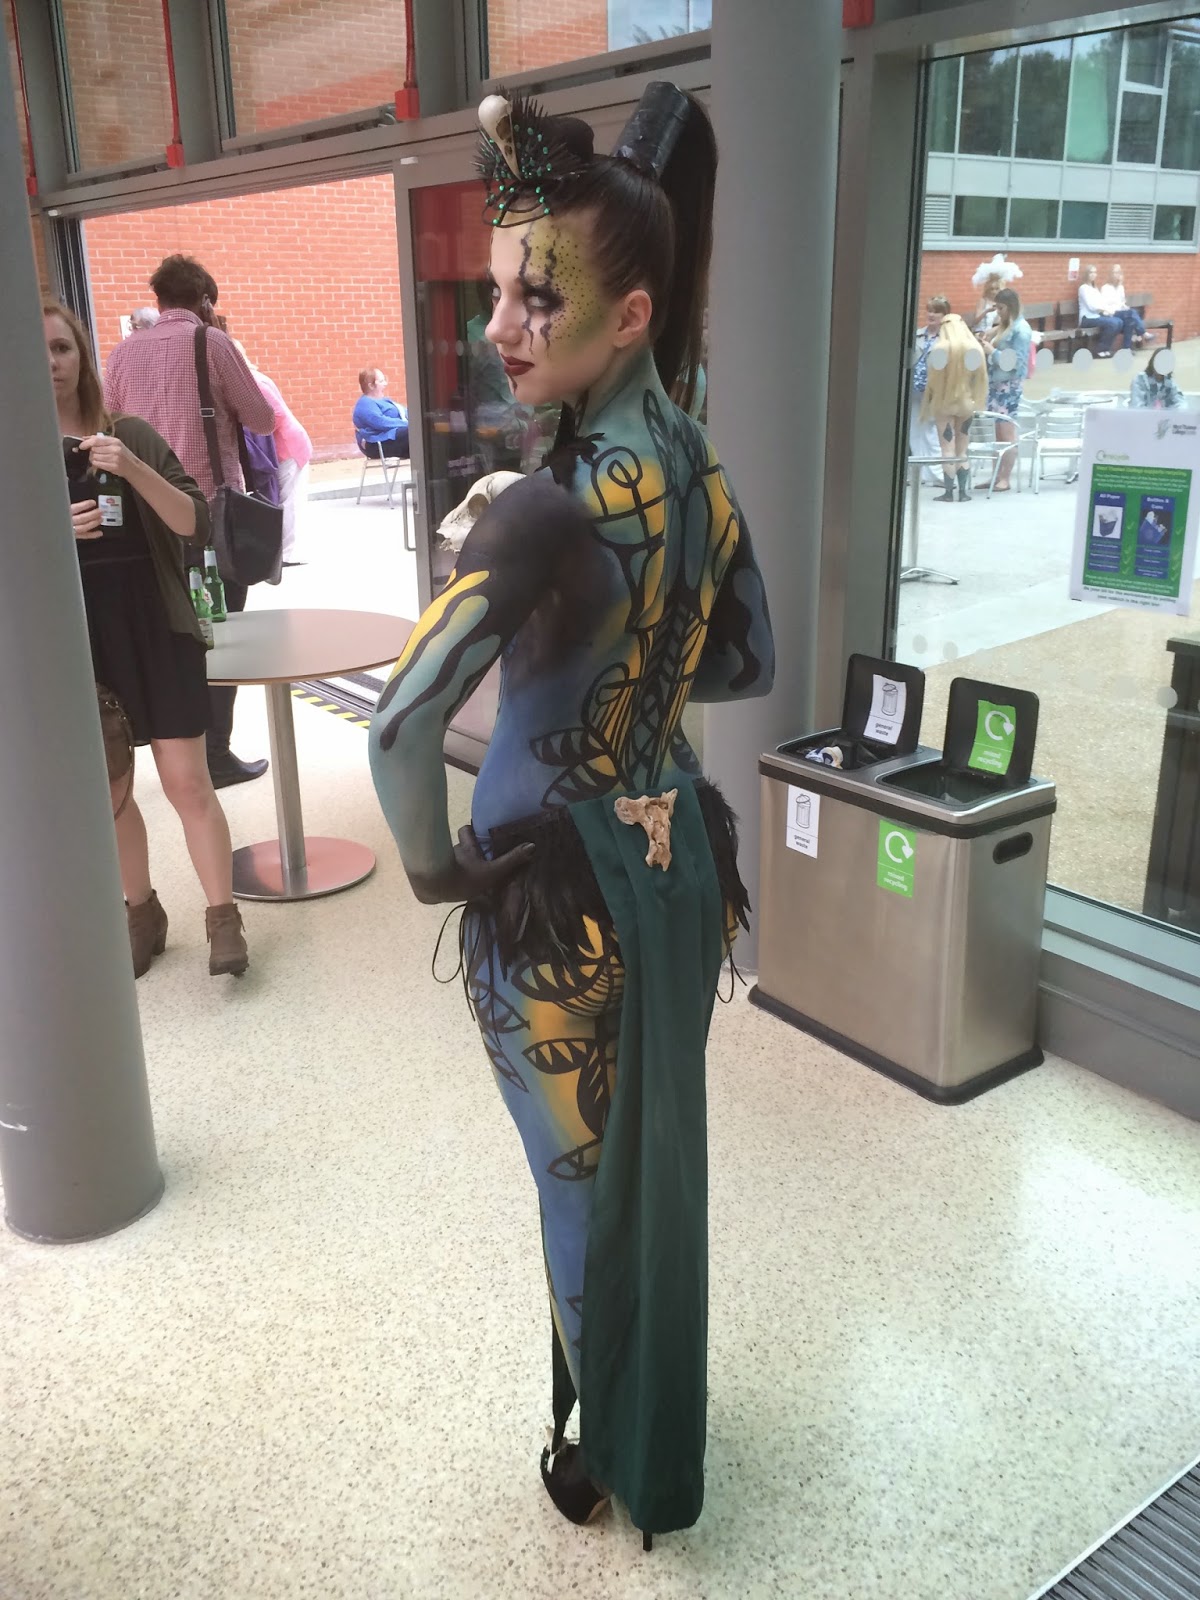
My next step was to start with the free hand patterns on the
front, back and the legs. I took my time with this step, as I wanted to ensure
that the lines were neat and symmetrical. I had started with the front, and I
had my model leaning back in the chair to keep her body as flat as possible
while I was working. I found that the
front went really well, and was a lot more symmetrical and tidy than my photo
shoot, so I was very pleased. The problems I did encounter however, were when I
was working on the legs. Every now and then, the paint was a bit too runny, and
it started to run downwards. Instead of letting it ruin my design or having to
wipe it off, I used it to my advantage. The patterns that I had created had
allowed me to improvise if it went wrong, so the drips weren’t too much of a
problem.
After painting the actual drips on to the top of the arms, I
filled in the gap with a solid black. I notice in the photo shoot, that solid
black on the shoulder stood out too much against the pattern and the blended
background. I decided to blend the black into the pattern on the body, which
made it look a lot better as it flowed.
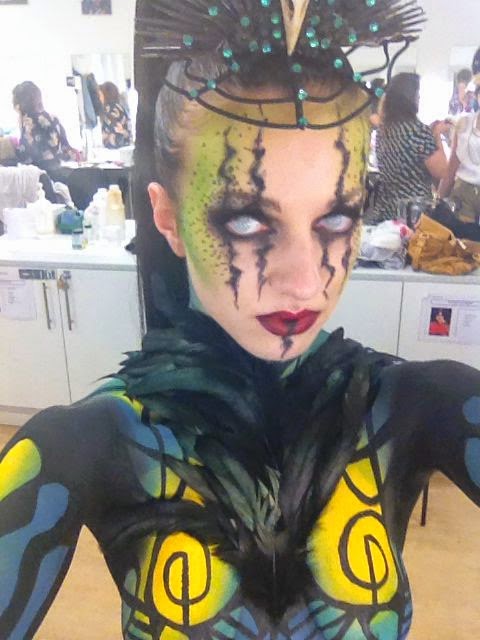
Next I began with the makeup. I asked my model to put in the
contact lenses first, to avoid watery eyes. She was comfortable with this as
she wears contacts on a daily basis. The makeup was very straight forward as I
was confident in what I was doing. I was a little bit flustered as I felt I was
running out of time, which made me do things in a different order than I would
have liked. After looking back at my photo shoot, I decided to change the
colour of the contour on the cheekbones from a natural grey colour, to a dark
green blue. I felt by doing this I added depth the green on the face, and it
would stand out more on the catwalk.
Next I had to attach the false ponytail and secure it with
the toilet roll. I managed to make it stand up nicely with a bit of help from
my tutor, as I need more than two hands! Afterwards I had to straighten the
natural hair to try and tame it, but after doing so I also tried serum and
hairspray to achieve a slightly better appearance. I still wasn’t satisfied, so
I created to small ponytails within the ponytail, and laid hair over it, and
secured it with small pins. This helped to flatten it down.
All of the makeup had been completed by this point, so it
was just the finishing touches that had to be done. This included gluing on the
feather front piece, which I did using latex. This went very smoothly, as I had
learnt from the photo shoot to leave it to get tacky before applying. I then
secured the loin cloth on with leather cord at each side, with the help from my
tutor, and also painted the armpits and the hands. Then it was just the head
dress, which was attached in a matter of seconds as it only need two pins to
secure it, and the shoes. I had cut down some insoles for the shoes to make
them slightly smaller, and then taped her feet into the shoes again. The
insoles made her feel even more comfortable and stable, so I was happy with
letting her walk down the stairs by herself.
Overall I am so pleased with how the day went, as everything
went smoothly apart from a few things that needed to be rectified. The show
went really well and felt I was able to show off my model. I ensured that she
was comfortable throughout, and we both had a really good time. The paint on my
models hands and armpits did come off slightly because of the heat, but other
than that everything else was fine. I have learnt so much over the past year,
and am very sad to be leaving West Thames and the amazing tutors.
Word count: 1110
My beautiful model Natalie


